| “This site contains affiliate links for which OEMDTC may be compensated” |
Technical Bulletin
| Division: | Automotive | Section Title: | Engine |
| Category: | Technical | TSB No. | TS 21 03259 |
| SUBJECT: | RUBBING NOISE COMING FROM FRONT (TIMING BELT COVER) AREA OF ENGINE |
| MODEL(S): | FORENZA, FORENZA WAGON, RENO (RQ420) |
| YEAR: | 2004~2008 |
| CONDITION: | The timing belt cam sprocket may be rubbing the inner surface of the timing belt cover. |
| CAUSE: | The timing cover may be slightly warped causing contact with the cam sprockets. |
| CORRECTION: | Please remove the cover and grind 2 mm of material from the timing cover at the area where the sprocket has contacted and re-install the cover. Use the attached instructions for inspection and repair. |
PART(S) INFORMATION:
| Part Number | Description | Qty. | Notes | |||
|---|---|---|---|---|---|---|
| 11390-85Z02 | Timing Belt Cover | 0 | Do Not replace the timing belt cover! | |||
WARRANTY CLAIM INFORMATION:
| Labor Operation | Description | Failed Part Number | Complaint Code | Defect Code | Labor Time | |
|---|---|---|---|---|---|---|
| AH9999 | Timing Belt Cover | 11390-85Z02 | 84 | 12 | 1.0 hrs. | |
- Make a record of the radio station presets.
- Ensure the AT shift lever is in “Park” for AT transmissions, and the parking brake is applied for both 5 speed and AT vehicles.
- Disconnect the battery negative cable.
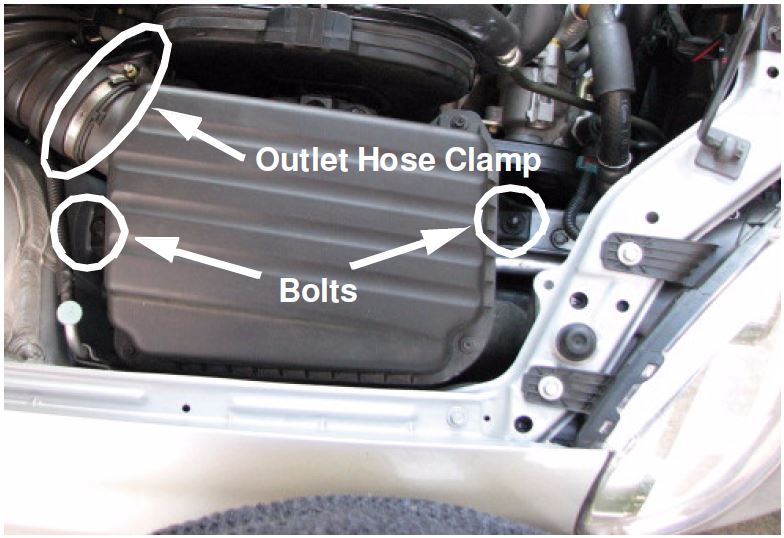
- Remove the air cleaner assembly by removing the two bolts and loosening the outlet hose clamp indicated in the illustration. Slip the outlet hose off of the air cleaner then lift the air cleaner out of the engine compartment.
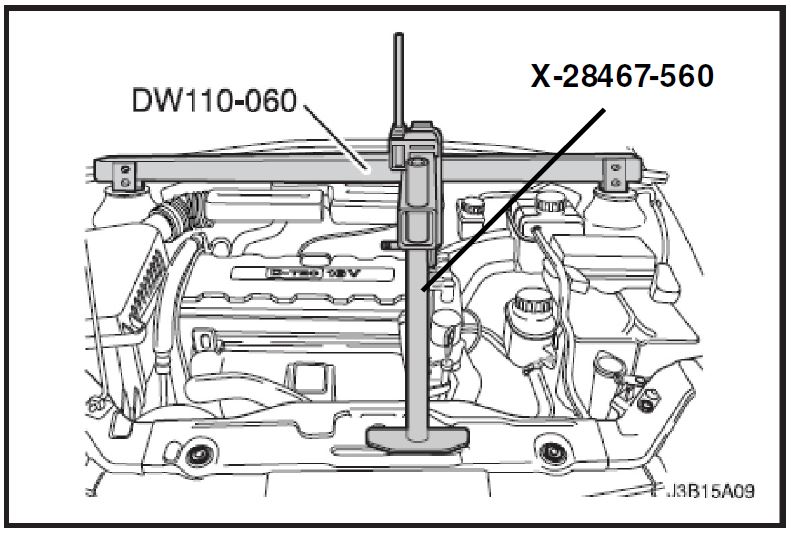
- Support the engine with the Engine Assembly Support Fixture DW110-060 and X-28467-560 Engine Assembly Support Channel or an equivalent engine support assembly
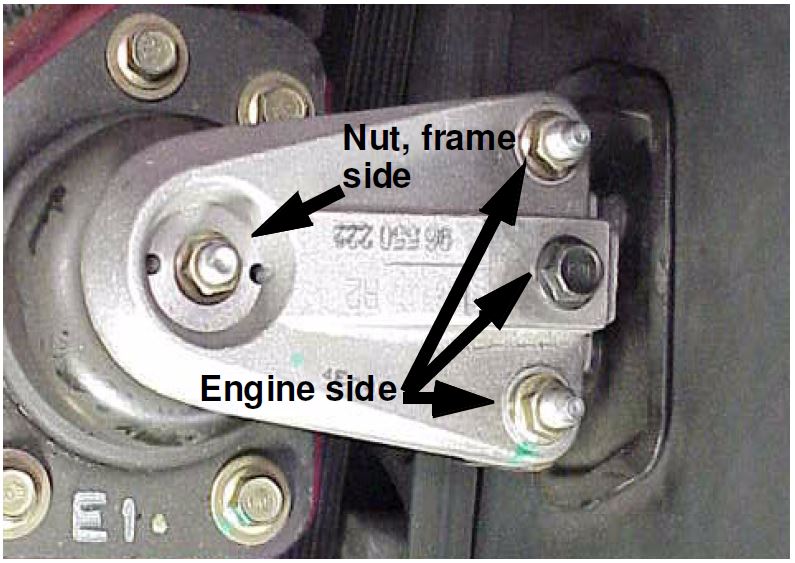
- Remove the engine mount bracket nut on the frame side first. Then raise the engine until the bracket starts to rise. You will see the stud retract into the bracket.
- Remove the remaining two nuts and bolt from the engine side, and remove the bracket.
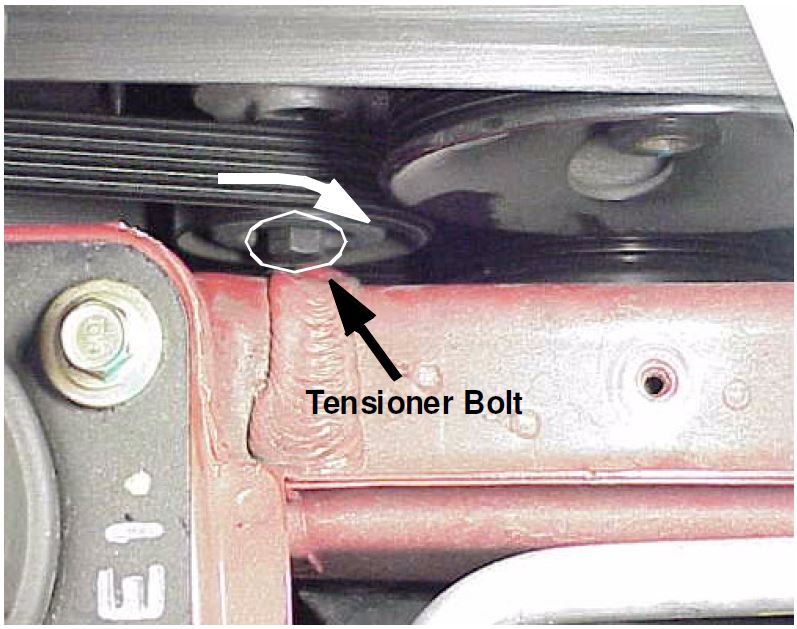
- Use a 15mm wrench to turn the tensioner bolt clockwise, releasing the tension on the serpentine accessory drive belt. Remove the belt.
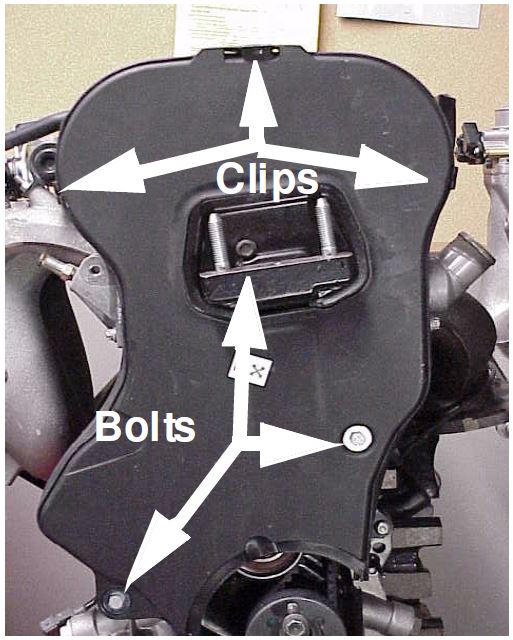
- Referring to the illustration, remove the timing belt cover by releasing the three clips at the top of the cover. Next remove the three bolts indicated. Tip the cover toward the fender to clear the engine mount bracket, and slide the cover up and out.
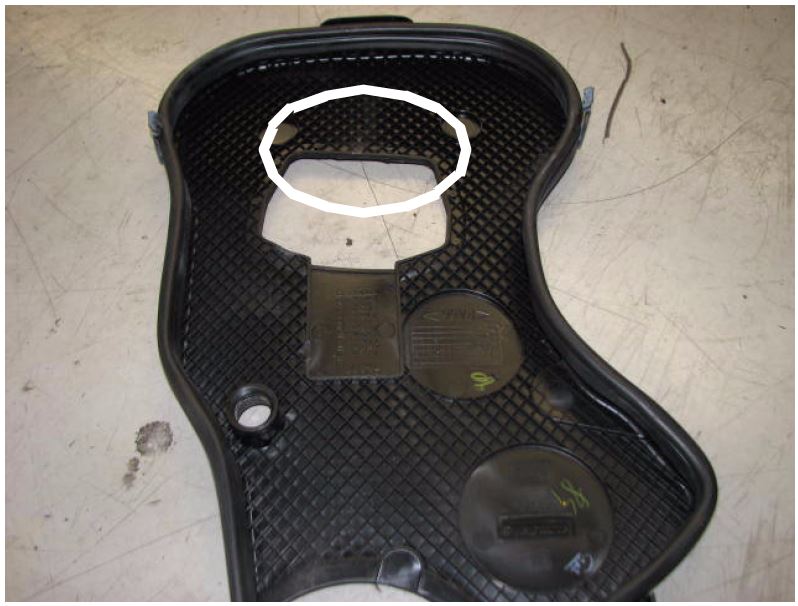
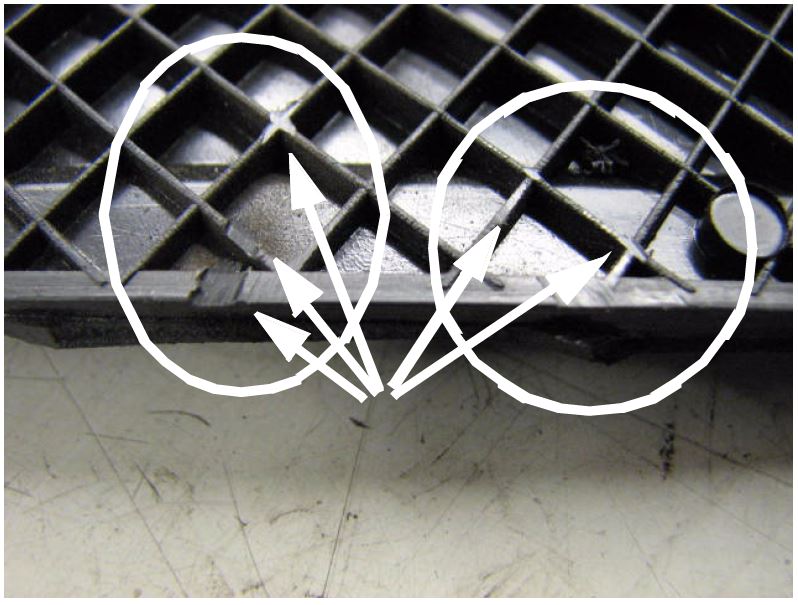
- Looking closely at the area indicated in the illustration, inspect the timing cover for contact marks from the timing belt or cam sprockets. If evidence is found confirming the source of the noise, continue to the next page.
- Mark the area with a wax pencil, white out, or anything that will be highly visible.
| WARNING
Failure to take the following precautions when performing the following repair procedure can result in injury. Always wear properly rated safety glasses or face shield, and suitable respiratory protection, when using a high speed grinder to remove material. The removed material will travel at high velocity in all directions. |
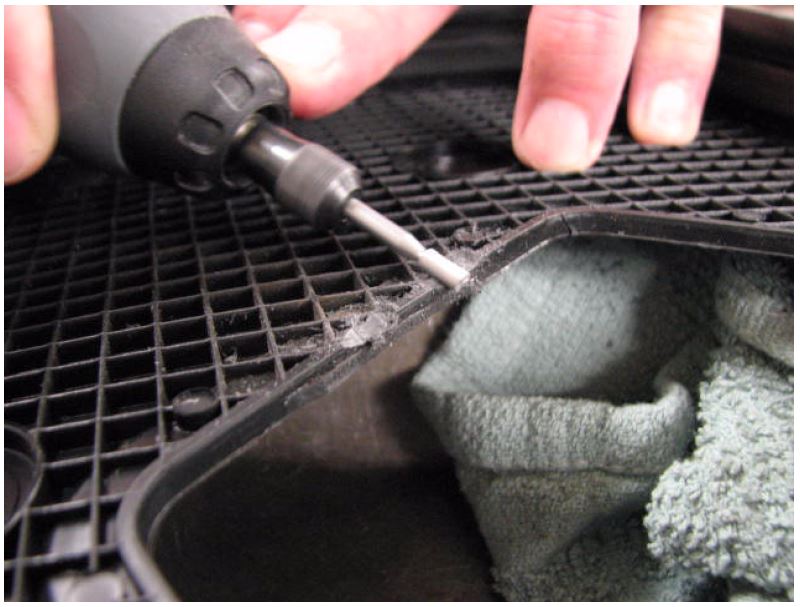
- Use a high speed grinder to carefully remove 2mm of material from all the affected areas of the timing cover.
- Reverse the removal procedure of the timing cover. Torque specs are highlighted in the table below.
- Reconnect the battery, and if necessary reprogram the radio presets.
 Loading...
Price Disclaimer
Price Disclaimer
Price Disclaimer
